Lately, here in sunny San Diego, it has definitely begun to feel like Fall. Living so close to the water, like we do here in Point Loma, this means that the nights and mornings have been filled with drizzle and heavy fog. This weather always makes me want to warm our home. My latest way to do this, making bread. Last year I taught myself how to make several different types of bread including: sourdough, challah, brown bread, and regular white bread. Yesterday I wrote about making sweet dough bread in the form of teddy bears. Today was all about the pita.
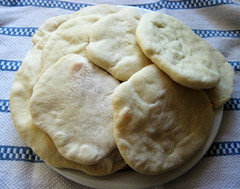
Our family loves pita bread. I have served it alongside my homemade tandori chicken. We have scooped up different flavors of hummus bought from the local farmer's market. My son likes it when his sandwiches are made with them. It had never occurred to me to make my own. Until today. I would like to say that, like most recipes I have encountered, I conquered it in my first attempt. However, this was not so. My dough rose perfectly and handled easily. I heated my pizza stone and oven to the temperature asked. I put my flattened dough on the heated stone and waited for them to rise. Though they bubbled, they never rose. I ended up with a lovely batch of delicious, soft flat bread.
HOMEMADE PITA BREAD
(Makes about 8 pita)
- 3 cups flour (white or whole wheat, or a mix. I used unbleached white the first time and white/wheat the second time)
- 1 1/2 tsp salt
- 1 tbsp agave nectar (sugar could be substituted)
- 1 packet yeast (2 1/4 tsp)
- 1 1/4 to 1 1/2 cups water, warmed (warm, but not uncomfortable to put your finger in it)
- 2 tbsp olive or vegetable oil
- In the bowl of a mixer, if you do not have one a medium sized bowl would do, with a dough hook attachment, mix the yeast in with the flour and salt.
In a measuring cup mix together 1 1/4 cup warm water, olive oil, and agave syrup. Add this to the flour/yeast mixture with the mixer on low.
All of the ingredients should form a ball. If some of the flour does not stick together with the rest of the dough, add more water (I had to add an extra 1/4 cup).
Once all of the ingredients form a ball, place the ball on a work surface, such as a cutting board, and knead the dough for approximately 10 minutes (lets face it, most of us would probably get tired before 10 minutes were up, so just knead until your hands get tired). If you are using an electric mixer, mix it at low speed for 10 minutes.
When you are done kneading the dough, place it in a bowl that has been lightly coated with oil. Form a ball out of the dough and place it into the bowl, rolling the ball of dough around in the bowl so that it has a light coat of oil on all sides. Cover the bowl with plastic wrap or a damp kitchen towel and set aside to rise until it has doubled in size, approximately 90 minutes.
When it has doubled in size, punch the dough down to release some of the trapped gases and divide it into 8 pieces. Roll each piece into a ball, cover the balls with a damp kitchen towel, and let them rest for 20 minutes.
 \
\While the dough is resting, preheat the oven to 475F degrees. If you have a pizza stone, put it in the oven to preheat as well. If you do not have a baking stone, turn a cookie sheet upside down and place it on the middle rack of the oven while you are preheating the oven. This will be the surface on which you bake your pitas.
After the dough has relaxed for 20 minutes, spread a light coating of flour on a work surface and place one of the balls of dough there. Sprinkle a little bit of flour on top of the dough and use a rolling pin or your hands to stretch and flatten the dough. You should be able to roll it out to between 1/8 and 1/4 inch thick. If the dough does not stretch sufficiently you can cover it with the damp towel and let it rest 5 to 10 minutes before trying again.
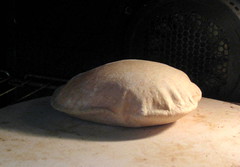
- Open the oven and place as many pitas as you can fit on the hot baking surface. They should be baked through and puffy after 3 minutes. It should should begin to start bubbling after one minute. If you want your pitas to be crispy and brown you can bake them for an additional 3 to 5 minutes, but it isn’t necessary.
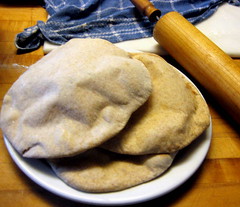
Or...just drop the temperature to 400F degrees and you have delicious flat bread ;)


No comments:
Post a Comment