Showing posts with label creamy. Show all posts

Monday, September 28, 2009

Manly Meal: Macaroni and Cheese Beer-ger Soup

Two nights a week I find myself rather short on time given that I am taking Cardiovascular Technology classes. On those nights, I need something that either can be put into a slow cooker and forgotten about, or is quick and easy to make. Today, I was busy trying to develop new recipes for fall inspired baked goods; so I needed to make something rather quickly. I also want to make sure that even though the meal was thrown together quickly, it was hearty and filling enough for my boys.

My boys love "manly" meals. What our family considers manly meals are ones that are hearty and full of meat. You know, food that men love. Our son loves being able to bond with his dad over their love for meat and cheese. And I...while I enjoy both meat and cheese, I do not quite share their deep rooted love, but I do love making them meals they love.

That was my inspiration for tonight: Macaroni and Cheese Beer-ger Soup.
Macaroni and Cheese Beer-ger Soup
With just a handful of ingredients you get a flavorful and filling soup that the most manly of men and daintiest of women will both enjoy.

MACARONI AND CHEESE BEER-GER SOUP

(Makes 6 hearty servings)
  • 1 (16oz) package of macaroni (I like to use rice macaroni)
  • 2 lbs ground sirloin
  • 1/2 cup carrot, diced
  • 1/2 cup onion, diced
  • 1/2 cup celery, diced
  • 2 tsp garlic, minced
  • 3 tbsp vegetable oil
  • 3 tbsp flour
  • 2 (12 oz) cans beer
  • 1 1/4 cups water
  • 2 1/2 cups chicken broth
  • 2/3 cup milk
  • 1/2 cup sour cream
  • 12 oz American cheese
  • 1/2 cup cheddar cheese , shredded
  • salt and pepper, to taste
  • hot sauce, optional
  1. Before you start on your soup base, get a big pot of salted water boiling. Once it has come to a rolling boil, add your macaroni. Cook your macaroni until al dente, or slightly chewy in the middle. Drain, rinse, and reserve for a little later on.
  2. Saute carrots, onion, celery and garlic in vegetable oil until tender. Whisk flour into sauteed vegetables and allow to cook for 1 minute while whisking constantly. You do not want your soup tasting of raw flour.
  3. Add beer to vegetable/flour mixture and whisk until all the flour has dissolved into beer. Add water, chicken broth and milk. Bring to a light simmer. Turn down burner and allow to simmer for 15 minutes.
  4. While the soup base is simmering, in a separate pan, brown and drain your ground sirloin.
  5. Add sour cream and American cheese. Stir until well incorporated. Also add your macaroni and browned ground sirloin.
  6. Add remaining cheese and stir until all the cheese has melted and been incorporated. Season with salt, pepper, and hot sauce (if using).
I hope you enjoy your manly meal. Happy cooking!

Thursday, September 24, 2009

Homemade Marshmallows...Enough Said.

Marshmallows.

When I think marshmallows, I think JetPuff. When I think JetPuff, I think of s'mores. When I think s'mores, I remember a time when I was five and decided to roast a bunch of marshmallows at once and put them on the bench beside me, so I would not have to keep stopping in between s'mores to make some more. Needless to say, the idea ended up going horribly awry. I ended up with a butt full of marshmallows, instead of a belly full (I accidentally sat on them). Back to marshmallows, yes marshmallows...I have always had an affinity for those little. white puffs of spongy goodness. There has always been something inexplicably strange, yet satisfying, to put one in your mouth; to feel it melt and squish across your tongue. Although, I was never fond of the powdery feeling you would feel in the inside of your cheeks when you had had too many.

The whole making my own marshmallows came about when, couple of days ago, I tried my hand at making whoopie pies for the first time. I had never had one before, but I wanted to try something different. Something that my kitchen has never seen before, or my family for that matter. Although I love cupcakes and they will always have a special place in my heart, kitchen, and stomach, I felt it was time for a change. Anyways, I know that whoopie pies usually have a marshmallow fluff based frosting, however, my whoopie pies were marshmallow fluff-free. Partially because that is not a usual staple in our pantries and partially because I had decided to make them spur-of-the-moment. I ended up using a "no-cook" version of 7 Minute Frosting (it is really a great, fluffy frosting I will have to put up one day). Everyone in the house loved the whoopie pies and suddenly I was thinking of creating new whoopie pie flavor combinations, which made me start thinking of marshmallows. Although 7 Minute Frosting tastes great sandwiched in a whoopie pie, I wanted a little more substance.

Sure, I could just go out and buy some marshmallow fluff, but I do not do store bought. Ok...sometimes I do do store bought, but I try to avoid if I can make it. I have seen many food magazines and blogs try their hand at making marshmallows, but I tried to avoid making them at all costs. I am not sure why. Perhaps it was reading the fact that a candy thermometer is often required, I know how to use one, but I am not a fan. Perhaps it was reading stories about marshmallow making going horribly awry. Either way, I have voiced my avoidance of making my own marshmallows to my husband on several occasions, the most recent being last week. And then this morning I announced to my husband, "Today, I am making marshmallows!"

I smiled and waited for him to respond. And he did.

"What happened to you saying you would NEVER make your own marshmallows because it was too messy and too much trouble?"

To which I responded like I always do when I change my mind, which is quite often. I just smiled my sheepish smile.

And do you know what? I am so unbelievably happy that I changed my mind. The marshmallows were not hard to make and they came out amazing! Everyone who has ever made, or tried a homemade, marshmallow is right, once you have had a REAL marshmallow, you never will go back to store bought marshmallows again.
Homemade Vanilla Marshmallows
JetPuff? JetPuff who? I am already dreaming up new flavors to try...

HOMEMADE VANILLA MARSHMALLOW RECIPE

(Makes about 90 (2 x 2) marshmallows. Recipe halves quite nicely.)
  • 4 tbsp gelatin (equals about 4 packets)
  • 3/4 cup water
  • 1 tbsp vanilla
  • 3 cups sugar
  • 1 1/4 cup light corn syrup
  • 3/4 cup water
  • 1/2 tsp salt
  • powdered sugar and rice flour (cornstarch may be substituted)
  1. Line an 11 x 15 baking pan with parchment or wax paper. If you do not have this size baking pan, you could use a 9 x 13 pan and a loaf pan for the excess. Coat the paper with vegetable oil or non-stick spray. At this time, also fit your mixer with the whisk attachment.
  2. Mix the vanilla extract and 3/4 cup of water in the bowl of a stand mixer and sprinkle the gelatin over to soften (also called blooming) for about 10 minutes.
  3. Put the sugar, corn syrup, remaining 3/4 cup water and salt in a heavy saucepan. Cover and bring to a boil. Once it comes to a boil, uncover and continue boiling until it reaches the soft-ball stage (234-240 F). I said before that I do not like using candy thermometers, so soft-ball stage would mean that if you dripped some of the hot sugar into ice cold water, it would form a ball. However, if you were to pick up the ball of sugar from the water it would still be malleable. This is how I tested when my sugar was done. Cooking sugar can be a temperamental process and temperatures can change quickly; so watch your sugar carefully. Also, remember this is hot sugar so please, BE CAREFUL.
  4. With the mixer at medium speed, pour all of the hot syrup slowly down the side of the bowl. Use great care as the mixture is very liquid and hot at this point and some may splash out of the bowl ; use a splash guard if you have one. After the mixture has started to come together, turn up the speed to high and whip until the mixture is very fluffy and stiff (about 8-10 minutes). You will notice at this point your mixture will grow quite a bit. Mine almost came to the top of my KitchenAid mixer's bowl.
  5. Pour mixture into the prepared pan and smooth with an oiled offset spatula so that it is level with the top of the rim (it should not completely fill the pan). Allow the mixture to sit, uncovered at room temperature until set and not that sticky. Most recipes will say 10-12 hours, even overnight. I found mine set in about 4 hours. However, it really depends on how thickly you poured your marshmallow and the weather. If it is really hot, you may find it difficult to make your marshmallow set.
  6. When the marshmallow is set, mix equal parts powdered sugar and rice flour and sift generously over the rested marshmallow slab. A lot of recipes I found use just powedered sugar, I think that it would be far too sweet and deter from the smooth, creamy, light flavor. I had read somewhere that some chefs use rice flour or potato starch since both are flavorless and coat the marshmallows without clumping.
  7. After you have liberally sifted the powder mixture onto the marshmallow slab, turn it out onto a cutting board, or counter, peel off the paper and dust with more powder mixture. Slice with an oiled chef's knife, oiled cookie cutters, or clean, oiled kitchen scissors. Dip all cut edges in powder mixture and shake off excess. Marshmallows will keep about three weeks at room temp in an air-tight container. If they last that long...

Thursday, September 17, 2009

Sesame Cupcakes and Honey Tea Ice Cream: A Match Made in Heaven

Things have been on high speed recently, with my son's science themed 8th birthday party this weekend, attending night school, and taking care of the day-to-days of the household. Yet through it all I have been trying to keep up with my blogging (a promise to myself to be more consistent), but yesterday I dropped the ball. I could blame it on the fact that the results of our first Cardiovascular Technology exam were revealed last night. I got an A, in case any of my readers were interested.

However, to make amends for mentioning all the yummy things I have been baking the past couple days on Twitter and on FoodBuzz; I am giving you two recipes tonight. Yes, you read correctly, two recipes. They are for the newest cupcake to grace my kitchen and the ice cream I created to accompany it.

I love sesame seeds. Asian desserts use these little, nutty bits of heaven to make sweet dessert-type drinks and as filling for glutinous rice balls that are served with a palm sugar sauce, which I love. My husband, though openminded, is not really a fan of such treats. Neither is our son. I decided to try making a cupcake, something our whole family loves, using black and white sesame seeds. Both are based upon recipes in Alice Medrich’s book Pure Desserts. They went over well in our household. So well in fact, that my husband says he is having some for dessert tonight.

Open Says Me Cupcake and homemade Honey Tea Ice Cream

OPEN SAYS ME CUPCAKES

(Makes 12-14 cupcakes.)
  • 1 1/2 cups all purpose flour
  • 1/2 tsp baking soda
  • 1/4 tsp baking powder
  • 1/4 tsp salt
  • 2 large eggs
  • 2 1/2 tsp toasted sesame oil
  • 1 tsp vanilla extract
  • 6 tbsp vegetable oil
  • 1 cup sugar
  • 1/2 cup buttermilk
  • 1/8 cup toasted black sesame seeds
  • 1/8 cup toasted white sesame seeds
Preheat the oven to 350F degrees.
  1. Combine the flour, baking soda, baking powder, and salt together in a bowl and set aside.
  2. Beat the eggs together in a bowl with a whisk. Add the sesame oil and vanilla and thoroughly combine.
  3. Add the vegetable oil, then the sugar and beat for several more minutes until it is light-colored and well blended.
  4. Pour in a third of the flour mixture, and beat just until combined. Scrape down the sides as necessary.
  5. Add half the buttermilk and beat until combined.
  6. Repeat with half of the remaining flour mixture, the rest of the buttermilk, and finally the rest of the flour mixture with the sesame seeds*. With each addition, beat it only until it is just incorporated.
  7. Bake in the oven for about 20-22 minutes, until the top is golden brown and a toothpick inserted into the center comes out clean.
*NOTE* You could just add the toasted sesame seeds whole, or like me, mix the two types of sesame seeds together and grind half of that mixture. It distributes the nutty sesame flavor more thoroughly throughout the cupcake.

HONEY TEA ICE CREAM

(Makes about 4 servings, 1 cup each)
  • 3/4 cup skim milk
  • 1/2 cup honey
  • 1/8 tsp salt
  • 2 cups cream
  • 2 black tea bags
  1. Heat the milk in a small saucepan until it just barely simmers around the edges. Pour into a bowl and steep the tea bags in the milk for about 10 minutes. Allow the tea milk to cool completely.
  2. Whisk in the honey and pinch of salt until they are dissolved. You have to make sure the milk is fully cooled or the mixture could curdle. Mix the honey in slowly and carefully at first.
  3. Whisk in the cream.
  4. Pour it in the ice cream machine, or do what I did, follow David Lebowitz's directions to make ice cream without a machine. It is a little more work, but very gratifying.
I hope your family enjoys these sweet, toasty cupcakes and delicious ice cream as well.
Happy Baking!


Sunday, September 13, 2009

Brown Sugar Chocolate Chip Cookies and Pure Decadence

Yesterday my darling friend Izzy, had our family, along with a few other friends, over to her house for a barbecue. And of course, besides bringing a side dish, I had to make something sweet to end the meal.

I found this the perfect opportunity to make Smitten Kitchen's absolutely drool-worthy Cheesecake-Marbled Brownies that she most recently blogged about. If there is something that my family really loves, it is chocolate. And, if there is something that my husband and son really love, it is brownies. I quite enjoy cheesecake, but the boys in my house (ie: the hubby and little monkey) are not really fans. So having cheesecake is rather a rare occurrence. However, when I showed my husband the amazing pictures of the brownies, he agreed that they definitely looked to be worth trying.

That was all the indication I needed to make them. Enough said.

As I went into the kitchen, laptop in tow, to start preparing the brownies; I noticed that the recipe was only meant to yield an 8 x 8 pan worth. Normally, I would just double to recipe to accommodate our larger crowd. Unfortunately for me, I only had enough unsweetened chocolate and cream cheese on hand for one batch; a result of a busy week of baking experiments. I also did not have enough time to go to the store to restock, bake, and cool the brownies before the event. So I started thinking about what could be paired with the brownies to extend this recipe to fit in a 9 x 13 pan. After some thinking, I figured chocolate chip cookies would be a great accompaniment to these decadent looking brownies. Specifically, a brown sugar chocolate chip cookie dough (since, once again, this week's baking had left me extremely low on granulated white sugar). The recipe is at the end of this blog.

And behold, these chewy, chocolaty, rich bits of heaven were born.
Cheesecake Swirl Brownie Cookie Bars

Everyone raved about these cheesecake-marbled brownie chocolate chip cookies bars (I might have to come up with a shorter name) last night. And the left over brown sugar chocolate chip cookie dough makes lovely cakey, crispy on the edges, cookies. A perfect Sunday afternoon: some brown sugar chocolate chip cookies and an ice cold glass of milk. Decadence!

Brown Sugar Chocolate Chip Cookies

BROWN SUGAR CHOCOLATE CHIP COOKIES

(Makes about 3-4 dozen. Recipe adapted from Baking Blonde.)
  • 1 cup (2 sticks) butter, softened (I used shortening, it yields a cakier cookie)
  • 1 1/2 cups brown sugar
  • 2 eggs
  • 2 tsp vanilla
  • 3 cups flour
  • 3/4 tsp Kosher salt (I used 1/2 tsp regular salt)
  • 1 tsp baking soda
  • 1 cup semisweet chocolate chips (I used semisweet mini chips)
  • 2 tbsp water (omit this if using butter)
Preheat oven to 350F degrees.
  1. Mix flour, salt, and baking soda together in a bowl; set aside.
  2. Beat the butter and brown sugar until thoroughly blended.
  3. Add eggs, and vanilla and mix well.
  4. Then add dry ingredients and mix just until all the flour is blended.
  5. Gently fold in your chocolate pieces.
  6. Scoop desired size of dough onto parchment paper-lined baking sheets.
  7. Bake 10-12 minutes (depending on the size of your cookies and your oven) or until cookies are just turning golden brown.
  8. Cool cookies on cookie sheets for 5 minutes. Then transfer to cooling rack until cooled completly. Serve or store in airtight container.

Friday, September 11, 2009

Cupcake Hero: Banana Pandan-monium!!!!

So...ok, I have not updated this blog in slightly over a week, things at my household have been rather crazy. Our son just started the third grade at a new school, my husband had a Navy meeting (he is on delayed entry...ugh!), and I have been in a quasi-baking-related funk.

No worries though, I am back with a renewed vigor and ready to take on the baking world once again.

If any of you have not heard, Cupcake Hero is back. It is now being hosted by the lovely iheartcuppycakes And this month's theme is: bananas. My family and I love bananas, unfortunately Mrs. iheartcuppycakes is not a fan. Now although I know she is not the only person deciding the winner, I felt it my mission to not only come up with something eye catching and unique, but also something that I think she would enjoy.

Over the past couple weeks I had been pouring over ideas and discussing them with my husband, to which he always just seemed to nod and agree, he trusts my judgement on all things baking-related. Finally, I thought I had "the cupcake": a red velvet cupcake with some sort of banana infused frosting. However, after trying it, it was not different enough. You know me, safe is never enough. Tried and true is never enough. I wanted more.

Enter my cupcake, "THE CUPCAKE": Banana Pandan-monium...a pandan coconut cupcake topped with a banana cream cheese frosting mixed with chopped pecans (for a textural crunch) along with a light sprinkling of desiccated coconut and a slice of banana.
Picture 210
The first thing you probably notice is...it is green. Not just green. It is green green. The coloring comes compliments of an Asian staple called pandan*. While some people will say it has an "herbal or floral" type flavor, I would say it is more of an earthy, somewhat nutty flavor which lends itself well to being paired with coconut, as I did in my recipe. Now I bet you are saying, "That is all fine and dandy, but I thought that the theme was bananas." You would be correct. And while I said that pandan lends itself well to the flavoring of coconut, it also goes exceptionally well with banana. So since pandan goes so well with both flavors; I used both in the cupcake. Also, what is great about this cupcake is that it is a one-bowl mix and does not require any eggs. I hope you enjoy this tropical and optically pleasing cupcake.

BANANA PANDAN-MONIUM CUPCAKES

"The Pandan-monium Part"

(Makes about 12 cupcakes. Recipe adapted by ToHappyVegans.)
  • 2 cups flour
  • 3 tsp baking powder
  • 1/2 cup sugar
  • 1/2 cup + 1tbsp oil
  • 1/2 cup coconut milk (I used coconut cream for a more pronounced coconut flavor)
  • 1 cup water
  • 1 tsp ( I used 2 tsp of pandan paste because I wanted a strong color and I love the taste)
  • 1/4 cup desiccated coconut
Preheat the oven to 350F degrees.

This recipe does not really require any numbered steps. Simply place all the ingredients into a bowl and mix until all the flour is combined. Place in souffle cups, or paper liners, and bake for (15-17 minutes, or until a toothpick inserted into the center comes out clean). Cool thoroughly on rack before frosting.

"The Banana Part (ie:Banana Cream Cheese Frosting)"
  • 1lb cream cheese, softened
  • 1/2 cup butter, softened
  • 4 cups sifted confectioners' sugar
  • 1 ripe banana, mashed
  • 1 tsp vanilla extract
  • 1/4 tsp almond extract
  • 1/3 cup pecans, chopped
  • desiccated coconut and banana slices, for garnish
In a large mixing bowl, beat the cream cheese, butter and extracts together until smooth. Add the sugar and on low speed, beat until incorporated. Increase the speed to high and mix until very light and fluffy. Fold in the pecans.

Frost completely cooled cupcakes. Top with a sprinkling of desiccated coconut and a banana slice.

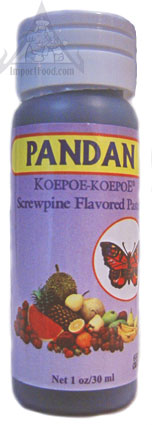
*NOTE* Pandan paste can most often be found in any local Asian food market. It usually is in the baking isle and looks like this.

Thursday, September 3, 2009

The Quest for Chinese Sponge Cake...

On Sunday night my parents invited my family over for homemade pizza (we make everything from scratch for pizza in our family) and, like usual, I made dessert.

Now that Bride and Groom 1.0's hot air balloon wedding has passed (they loved their cake by the way, so much so that Bride 1.0 kept one of the birds as a memento) and my son's 8th birthday party fast approaching, along with my Cupcake Hero entry, I decided that Sunday would be a great day to make a dessert just for my family and I. A dessert that had no ulterior motives, no weddings, no birthdays... Perhaps just to end the week on a sweet note. A week of immense heat, humidity, and second degree sugar burns. After Saturday night's Asian dinner success, I have been itching to try more Asian recipes. During Saturday night's dinner my father had mentioned that since I love baking so much, I should try and learn how to make Chinese Sponge Cake also known as Gai Don Go. Otherwise known as "Chinese Birthday Cake."

Chinese Sponge Cake is nothing more than a light, but slightly eggy, sponge cake with layers of whipped cream and fruit. It is light. It is sweet in the most understated manner. It is simple.
Chinese Sponge Cake aka "Chinese Birthday Cake"
It is delicious.

It apparently is also very difficult to find a recipe for. I cannot tell you how many searches, forums, and websites I had to go through even to find something that looked to be promising. One of the main problems is because most Chinese Sponge Cakes, or anything of the sponge or cake nature, in Chinese cooking tends to be steamed. This cake, however, is baked which made the search all the more difficult. Fear not though, for I have hope for all of you out there in search of the Holy Grail of Chinese cooking, for I have found one that is so close to the Chinese bakery style cake that my own Chinese father kept the half of the cake, and all the cupcakes, that I had brought over to end our meal. If that does not tell you it is great, I do not know what will. This recipe is Chinese father approved.

CHINESE "BIRTHDAY" SPONGE (CUP)CAKE (Gai Don Go)
Cute China Doll
(Recipe adapted from Chocolate & Zucchini. Makes 36 cupcakes. Or 1-9x13 cake. Or like I did: 18 cupcakes and 1-9in cake. )

  • 1 cup plus 1 tbsp cake flour (if you do not have cake flour around, take a 1-cup measuring cup and put 2 tbsp of corn starch in the bottom, then fill the rest of the way with all purpose flour. It makes a good substitute)
  • 1 tsp baking powder
  • 6 eggs, separated (room temperature)
  • 1/2 tsp cream of tartar (I added it to further stabilize the egg whites)
  • 1/4 tsp salt (She asks for a pinch, what is a pinch really?)
  • 1 tsp pure vanilla extract
  • 3/4 cup granulated sugar
  • 1/2 cup water
  • 1/3 cup oil
Preheat oven to 340F degrees.

  1. Prepare souffle cups, if making cupcakes, or ungreased aluminum cake pans. DO NOT use nonstick cake pans. However, if you only have nonstick cake pans, line the edges, just the edges, with aluminum foil. It will give the cake something to grip to which will help with the rising of the cakes. The rise of this cake is quite crucial.
  2. Sift the flour and baking powder together 3 times, or combine the flour and baking powder in a freezer bag, zip it shut with lots of air inside so it will form a balloon of sorts, and shake the bag vigorously to make the flour fluffy. Set aside.
  3. In a large bowl, combine the egg yolks, salt, vanilla extract, and 6 tablespoons of the sugar (reserve the rest for later). Whisk for several minutes, until the mixture turns pale yellow and thick ribbons fall from the whisk.
  4. Stir in the water and the oil, and whisk well between each addition. Fold in the flour mixture and whisk until well blended, but don't overmix.
  5. In another large, clean bowl, combine the egg whites, cream of tartar and reserved sugar, and beat with a clean whisk until stiff. You may use an electric whisk or a stand mixer with the whisk attachment; make sure neither the bowl nor the whisk have any trace of fat, or the eggs will not rise and cake will be of flat variety and not of sponge decent.
  6. Fold a third of the beaten egg whites into the batter and mix gently until blended. Fold in the rest of the egg whites, gently lifting the batter up and over the egg whites with a rubber spatula until just blended.
  7. Pour the batter into the prepared cups, or pans, to about 3/5 of their capacity. Bake until set and golden brown (about 20 minutes for cupcakes and 35-40 minutes for cakes).
  8. Invert the cups onto a cooling rack so the cakes will not collapse, and let cool completely.
  9. To unmold, run the blade of a knife around the inside of the cup to loosen, and shake gently until the cake falls out.
Once your cake is cooled, feel free to eat as is, which is absolutely yummy. Or do as I did and decorate with fruit and freshly whipped, slightly sweetened whipped cream. Just use whatever type fruit, or filling, you like. Be creative. Have fun with it.
Chinese Sponge Cake aka "Chinese Birthday Cake"
Happy Baking!

Wednesday, September 2, 2009

Easy Cake Mix Cookies and Ice Cream Sandwiches

The last couple days have been very busy, even more so than the normal rigors of our everyday life. Not too busy that I have not been able to bake or cook a single thing. Yeah right! Would never happen in my house.

No...these past couple days have been filled with the recipe hunt for, and creation, of my first Chinese Sponge Cake, making a surprise Alien birthday cake for my son, Kyle, who turned 8-years-old today, and the creation and execution of a pork chop dish (all of which will be in blogs to come).


However, today's blog will be about something completely different. Actually, it will not even be about something I baked. Today, in honor of my son, Kyle, turning 8-years-old today, he is the star of this blog. He has been watching me chronicle my kitchen adventures and wanted to be a part of it. So yesterday, while we were purchasing some last minute things for his birthday cake, he asked if he could make a treat for his father, and if I would put it in my blog. How could I deny such a fun and innocent request? So without further adieu...here is Kyle's captioned photo blog...

KYLE'S EASY CAKE MIX COOKIES AND ICE CREAM SANDWICHES
The finished ice cream sandwiches

(Makes 22 cake mix cookies and 11 ice cream sandwiches)
  • 1 box of cake mix (we used Pilsbury's Moist Deluxe Chocolate Cake)
  • 1/3 cup vegetable oil
  • 2 eggs
  • 1 pint ice cream, softened
  • sprinkles, chopped nuts, jimmies
Super simple ingredients

First you pour the cake mix into a bowl.
Pour the mix

Then you whack the two eggs into the bowl.
Crack the eggs

Make sure you wash your hands after you touch the eggs or you could get sick.
Washing hands after touching raw eggs

Then put the oil in.
Add the oil

Then you mix it all up and if it gets too hard to stir, give it to mom.
Stir really good

And then show off like you stirred it.
This is the batter

Scoop spoonfuls of batter (about a well-rounded tablespoon) and roll them into balls. This is my favorite part!
Roll the dough

Smash them, not too hard, just kind of flat on a (ungreased) cookie pan (wax paper was put on because I let him use old cookie sheets). And after they're all done, you can lick the spoon. My other favorite part!
Now you can lick the spoon

Put them in the oven and bake them (7-9 minutes, or until puffed and only slightly depressed when lightly touched). You should probably let your mom do this. When they're done, let her take them out. You can swim while they cool down.

NOW THE FUN PART...ICE CREAM SANDWICHES!!!

Take a spoon of kinda melted (softened) ice cream onto one cookie.
Spread on softened ice cream

Put another cookie on top and kind of smash them together. Not too hard or the ice cream comes out!
Lightly squeeze together

Then you roll them in sprinkles. I picked out Turtle Crunch for these.
Roll in topping of your choice

Then...ta-da...it's done!
The finished product

You can stick them in the freezer. Or...eat them right away, like me!
Now you can eat!

You should make some today...my dad loved them!
Dad eating one of his ice cream sandwiches

Friday, August 28, 2009

Mini Wedding Cakes and Second Degree Burns

Today is only about halfway over and I have already had enough. I am currently typing with only seven of my ten fingers(one cannot be used simply because of the fingers that were injured).

Why?

Second degree burns. More on that later...

About a week ago my darling friend Valancy Jane asked if I could make a mini wedding cake for her darling friend, Bride 1.0. You see, Bride 1.0 and her fiance, Groom 1.0, are planning a bigger wedding later this year, but were craving something more intimate first. Enter Bride 1.0's surprise for her adventerous, but unknowing, fiance...a surprise wedding. Tomorrow. In a hot air balloon.

Yes, she is a daring young lady.

On top of that, my darling Valancy Jane has become ordained online and will be performing the wedding tomorrow, in handmade clergywear nonetheless. After Valancy had divulged all of this, and after having brief email correspondence with Bride 1.0, I was ready to tackle the mission given. The only guideline I was given: no chocolate.

Having lately dedicated my time to cupcakes and french macarons (not macaroons), I thought I should do a tester mini wedding cake before going headfirst into the real deal. Here is what I came up with:
My first mini wedding cake
An almond brown sugar cake filled with italian buttercream and lemon curd topped with more italian buttercream and marshmallow fondant roses brushed with edible glitter.

It was nice. Simple. Yummy. I was ready for the real deal.

But since I am me: a classic Asian perfectionist and all-around overachiever, I could not leave nice, simple, and yummy alone. I wanted more. I wanted something as grandiose as this wedding was going to be.

My plan of action: a two tier mini cake filled with lemon curd, the bottom layer a simple covering of brown sugar swiss meringue buttercream, the top layer covered in marshmallow fondant (Bride 1.0 likes fondant, Groom 1.0 not really a fan) with decorations made out of marshmallow fondant and gum paste. Note: I am still rather green when it comes to working with gum paste and marshmallow fondant, but given my artsy background I had a feeling I would love it. And I do.

In my mind I had a vision of what I wanted the top tier to look like, I even sketched it out and everything. It was going to be a top layer that looked like a hot air balloon basket with two lovebirds inside, a banner with their names on it, and a 3D hot air balloon. I started modeling and painting my figures several days ago, as I knew it would take a while for them to dry. Then I covered the top layer in fondant and assembled the banner and birds like I had invisioned...
Topper for Bride and Groom 1.0's Mini Wedding Cake
...the only thing I had left to figure out was the 3D hot air balloon.

I had been fretting and trying out things daily, growing more anxious as the big day grew closer. Last night, my husband told me that I should just leave well enough alone and take the two tier mini wedding cake to Valancy today...sans the 3D hot air balloon. While I agreed that the cake looked rather lovely without the hot air balloon, I wanted the hot air balloon. I NEEDED the hot air balloon.

So while my family had gone to bed, I stayed up trying to figure out how to make my 3D balloon a reality. Finally, at 6am this morning, I had come up with my plan. I put the plan into action and it seemed to be working, but once I went to heat some more sugar that is when things went horribly wrong...I blame it on my impatience, on my tendency to dive into things headfirst, and my desire to be extremely detailed and beyond expectation. Whatever the reason, when I went to go get the hot sugar I got some of it onto my right middle and ring finger. OUCH!

It actually took a few seconds of my fingers burning to realize I was burning. I immediately put my emergency medicine background into use and submerged my burnt fingers into icy water, but as many of you have worked with sugar know, hot sugar keeps on burning, even after it has been removed...painful! I could see white blisters emerging as soon as I took them out of the icy water. After I popped a few rapid release Tylenol and my darling husband had assisted me in wrapping my fingers...
Molten Sugar+Bare Hand=2nd degree burns
I went back to work...but with one disappointing reality, the 3D hot air balloon was not going to happen.

I had to work quickly to cover the area I had opened up on the top of the cake to place the hot air balloon. My new plan...a few more handmade red roses (Bride 1.0 had mentioned during one of our correspondences something about red roses). The cake was saved and was finished in time to take to Valancy before she heads up to see Bride 1.0.
Bride and Groom 1.0's Mini Wedding Cake
Lesson of the day: sometimes it is okay to be simple. To be plain. To just be yummy.

But it does not mean I will not try to be grand next time...

Thursday, August 27, 2009

Summer Heat and Creamy Baked Potato Soup

Lately the weather has been extremely hot and humid here in San Diego, even though we live five minutes from the beach, which is thwarting my ventures into marshmallow fondant and making it rather difficult to come up with dinners for my family where I am not slaving in a hot kitchen.

So what did I decide to cook for my boys today?

Creamy Baked Potato Soup.

Yes, you read right. Creamy Baked Potato Soup.

While the weather has been borderline unbearable, there are two things my family and I cannot deny: filling, flavorful soups and potatoes. I also found that, with this soup, I was able to make something we all could enjoy after going to the gym and limit my time in the kitchen.

The first thing you need is baked potatoes.
How to bake potatoes quickly and evenly
In this photo you probably noticed that not only are my potatoes wrapped in foil, but they are also on a metal skewer. It is something I learned from watching Nigella Lawson's Food Network show "Nigella Feasts." She says that it makes the potatoes cook faster and evenly. And you know what? It works.

Then you will need just a couple more things:
Ingredients for Creamy Baked Potato Soup
milk (we like skim milk in our house), chicken broth, bacon (or salt pork, sometimes I use a mix of both), finely diced onion, sour cream, and selection of spices.

Many baked potato soups ask for a lot of butter and flour, but I find that the starches in the potato, along with the addition of chicken broth, makes the soup rich enough. However, depending on how creamy you and your family like it a little slurry goes a long way...

CREAMY BAKED POTATO SOUP

(Serves 6 to 8)
  • 12 slices bacon (or like today: 6 slices of peppered bacon and a 3-in block of salt pork)
  • 4 cups milk
  • 3 cups chicken broth
  • 4 large (8 smallish medium) baked potatoes, peeled and cubed
  • 1/2 small onion, finely diced
  • 1/2 cup sour cream
  • 1 teaspoon salt (omit if using salt pork)
  • 1 1/2 teaspoon freshly cracked black pepper
  • 1 teaspoon rosemary
  • 1 1/2 teaspoon Italian seasoning
  • 1/2 cup cheddar cheese, shredded (optional)
  • slurry {2 tablespoons cornstarch mixed with 4 tablespoons water}, (optional)
  1. Place bacon/salt pork in a large, deep skillet. Cook over medium heat until slightly browned and most of the fat has been rendered. Drain, crumble, and set aside.
  2. Drain half of the fat that was rendered, leaving the other half in the pan. Add the finely diced onion and saute until almost translucent. Add back the bacon/salt pork and the seasoning. Cook until the onion is softened and the seasoning has become fragrant.Cooking down the bacon, onions, and seasoning
  3. Gradually stir in milk and chicken broth. Once it starts to simmer, stir in potatoes. Bring to a boil, stirring frequently. At this point, if you would like a thicker soup, add the slurry and stir. Bringing it up to a boil
  4. Reduce heat, and simmer 10 minutes. Mix in the cheese, if you are including it, and the sour cream. Continue cooking, stirring frequently, until cheese is melted.
And then...it is done...Creamy Baked Potato Soup for a hot summer night.
Creamy Baked Potato Soup
Enjoy!

Thursday, August 20, 2009

When life gives you lemons...

...make curd; is what I say.

Homemade Low-Fat Lemon Curd 2 Homemade Low-Fat Lemon Curd
There are few things that I feel epitomize summer like a bright, tangy lemon curd. Perhaps it is the sunny yellow that makes me think summer and feel so happy. Or the cool tang it possess when it hits your lips, be it on a scone or the center of a luscious cupcake, like a glass of lemonade from some kids on your nearby corner. And while this lemon curd might take more time than it takes to fish a quarter out of your pocket, it is far less sugary and very much worth the extra time.

I find that lemon curd, especially this one, tastes so good that it is very difficult to stop at only a few bites. Unfortunately, the richness of lemon curd, or any curd for that matter, primarily comes from fat, most often butter, and although the zest of the lemon makes the curd taste lighter, most versions are far from healthy fare. Is it not always our luck that the most tasty things are the ones we should not be overindulging in? Luckily, this recipe calls only for eggs, so not only do you get the same sweet and tart flavor of the common lemon curds, this one is lower in fat. Which we all can consider a bonus during these bikini months.

I found this recipe while perusing Nicole Weston's blog Baking Bites, which I absolutely love by the way, I saw that she had a go-to recipe for lemon curd that she had acquired from Chocolate and the Art of Low Fat Desserts by Alice Medrich. If you have one or two lemons on hand, this is the perfect brunch accompaniment or light dessert topping.

LOW-FAT LEMON CURD

(Recipe from Chocolate and the Art of Low Fat Desserts. Makes about 2/3 cup)

  • 1/3 cup strained, fresh lemon juice
  • 2 tsp fresh lemon zest ( I like mine very tangy, so I include the zest from the entire amount of lemons used)
  • 5 tbsp sugar
  • 1 large egg, room temperature
  • 1/2 tsp vanilla extract

  1. In a small sauce pan, over medium heat, combine sugar and lemon juice. Add zest and stir until sugar is dissolved completely.

  2. In a medium bowl, lightly beat egg.
  3. Whisking constantly (or with an electric mixer on low), very slowly stream the hot lemon-sugar syrup into the egg. Beat for 2 minutes (only 1 if you’re using a mixer), then transfer back into the saucepan by pouring the mixture through a sieve.

  4. Cook over low heat, stirring constantly, until the curd just comes to a boil.

  5. Remove from heat and stir in vanilla.

  6. Transfer to a small airtight container and store in the fridge.

    Makes about 2/3 cup. Recipe can be doubled.